- Home
- Algebra Games
- Algebra Tiles
Algebra Tiles
"Hands-On Algebra"
If you like the hands-on approach to teaching, then maybe you know about algebra tiles. Check out the video below to learn more about how they can help engage your algebra students.
The tiles are good manipulatives to give students a hands-on approach to be used in addition to the normal way it's taught in the classroom.
Let's see how we can use "algebraic tiles to model operations involving integers".
Adding Integers with Tiles
The yellow square represents a +1 (positive 1).
The red square will represent a -1 (negative 1).
- When you put these two squares together, their sum is zero.
- A yellow and red square together can be referred to as because as we said above when added their sum is zero.
Let's try this example....
(+4) + (-2)
Step 1: Lay out the appropriate tiles for your addition problem. In our example of (+4) + (-2), we need to lay out four yellow squares and two red squares.
Step 2: Circle the zero pairs. So below you can see we have circle two zero pairs.
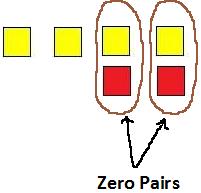
Step 3: Remove the zero pairs, and whatever squares you have left will be the answer to the addition problem. You will always have just one color left, either red or yellow. So in this case we have two yellow squares left.
So the answer to the problem is......
(+4) + (-2) = (+2)
Solving One Step Algebra Equations with Tiles
One of the first things algebra students learn, and most seem to remember is "whatever you do to one side of the equation, you have to do to the side of the equation too!"
For our first equation, let's solve:
3x = 9
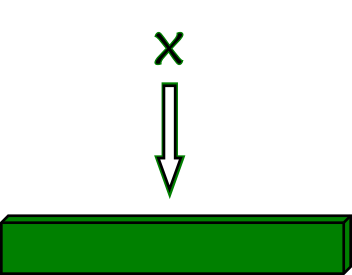
First, we need to introduce the variable x, and in our algebra tiles, it's represented by a long green rectangle as seen below:
Steps To Solve Equation:
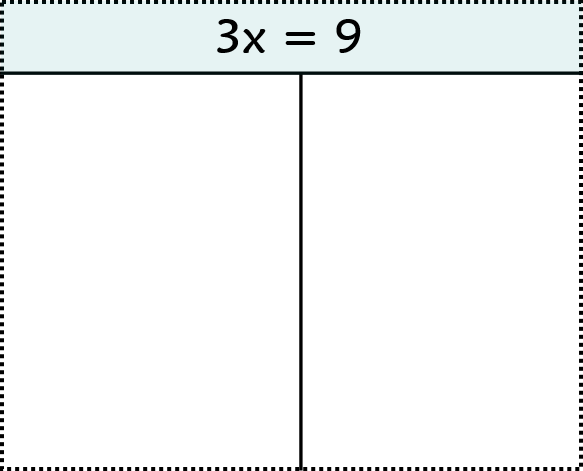
- Write the equation at the top of the paper and draw a vertical line from the equal sign down the paper. The vertical line drawn separates our equation into a "left-side" and a "right-side".
The "Goal" of solving any algebra equation is
to get the variable by itself on one side of the equation.
Our variable here is "x".
- Use the algebra tiles to "model" the equation on each side:
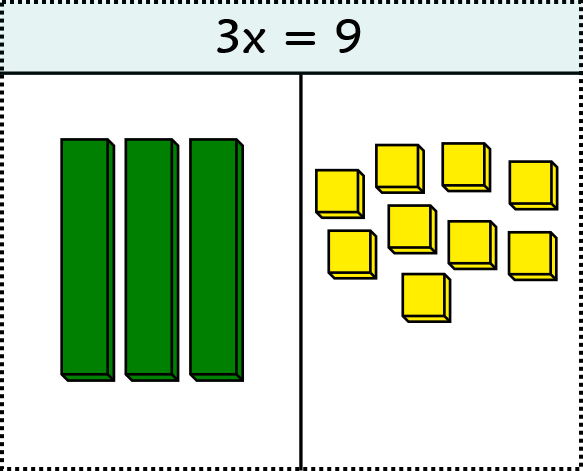
- Next, take the side with the x tiles and divide it into equal groups of x, so therefore we divide into three groups of one x each. See picture below:
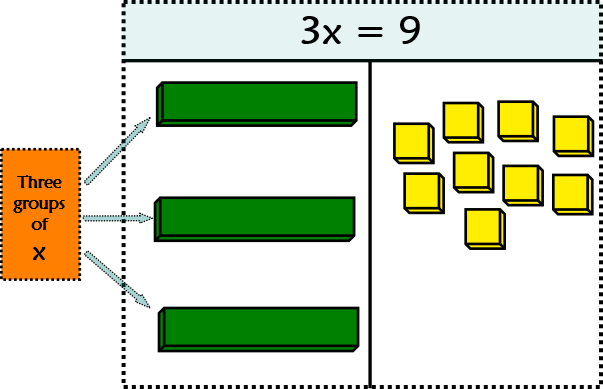
We know in algebra, whatever we do to "one side of the equation", we have to do to the "other side of the equation".
- So therefore the next step is to divide the yellow tiles into three equal groups.
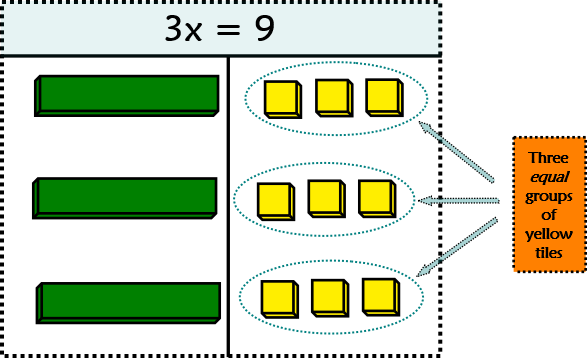
So now we see that
x = 3
So we Solved the Equation!
Solving Multistep Algebra Equations with Tiles
You might want to check out this video explaining how the tiles work.
There are a variety of hands-on approaches to teaching algebra in the classroom or at home if you home school. Besides the regular text book methods most of us grew up on, many more teachers and schools are integrating hands-on teaching methods and finding them to be very effective.
Studies have shown that when kids are more interested in the subject matter, they tend to learn material better and their retention rate also improves. Besides, if they are enjoying them selves more it makes your job that much more enjoyable.
Return from Algebra Tiles page to Math Games Home


